You can navigate back to the ‘Post’ tab to update the relevant category, classification, insight bubble, etc. and make any text edits (if needed).
The system will automatically bring in your first file name as the “post headline”. It will also read the text of the document and use AI to create a three-paragraph auto-summary.
Both the headline and the automated summary can be edited.
The first page of your document will be the cover image of the post. You can click the “+ add image” box in the upper right-hand corner to load a different cover image.
You can write an insight in the bubble about the content you have uploaded. This helps users quickly understand the impact of your document.
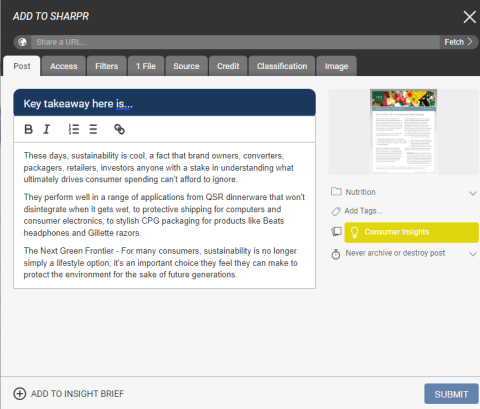
To Organize your Post:
Users can organize their posts by giving custom titles, insight bubbles, and summaries when editing. You can also organize your post by customizing the post’s hierarchy which consists of the following:
- Default Hierarchy
- Category
- Classification
- Tags
- Optional Additional Hierarchy
- Taxonomies/Filters
If any of these fields are ‘required’ per your account admin, you will get a popup message indicating such prior to being able to submit your post.
Note: Please refer to the “Defining Hierarchy” sections to learn more about hierarchical features.
Adding a URL:
Please note: The preferred method when adding an online URL is to use Sharp It.
Click “+create post”.
At the top, there is a “share a URL” space. Copy your link here and hit “fetch”.
This will scrape the text and an image from this page and populate it on your “create post” popup.
Note: You can also add a file here, if you’d like.